

Looking for a simple Valentine’s day treat to make with kids? Try these heart cake pops! No only are these Valentine’s day cake pops easy to make – kids will love helping to decorate them!
RELATED: How to Make Cake Pops

Valentine’s Day Heart Cake Pops
This is the easiest way to make adorable heart-shaped cake pops for Valentine’s Day! Not only can anyone do this – but kids will love helping too!
Have you ever made cake pops before? If you haven’t, be sure to review our How to Make Cake Pops tutorial. It is a great step-by-step tutorial on how to make traditional cake pops.

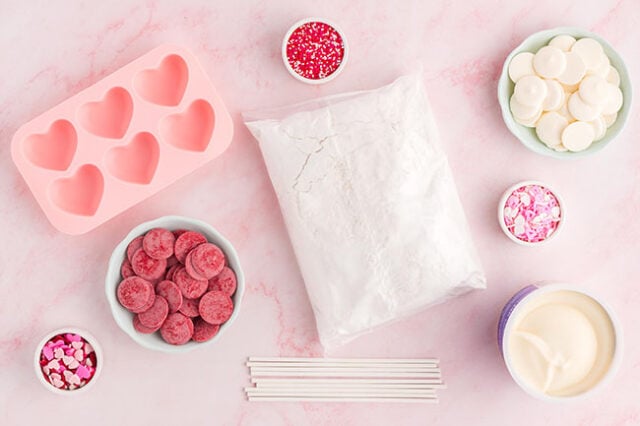
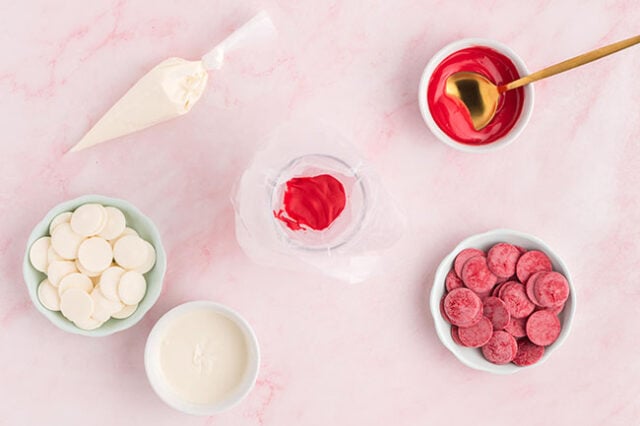
Ingredients Needed
- Heart sprinkles -a mix of small heart sprinkles or colored dot sprinkles look great on these cake pops.
You can also turn these into Valentine treats to hand out. Insert the cake pop into a treat bag with the cake side first. Secure the bag by tying a ribbon or wrapping a twist-tie around the stick approximately 1⁄4 inch down.

How to Make Heart Cake Pops
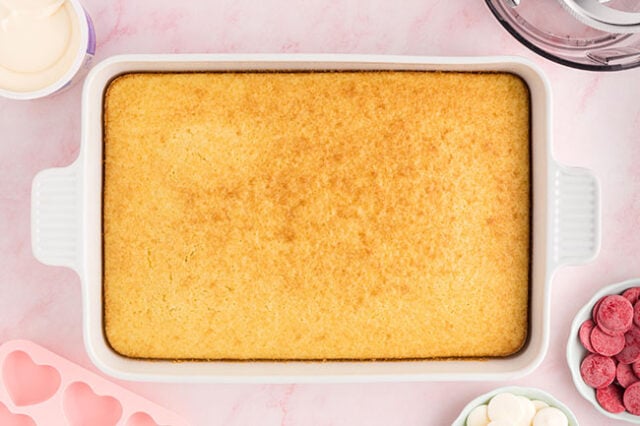
1. First, bake a cake.
Follow the directions of the cake mix purchased. You can also use leftover cake!
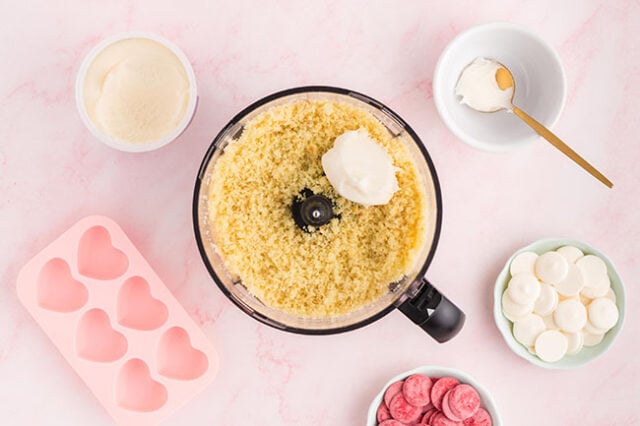
2. Crumble the cake.
Once it’s baked and cooled, use a food processor to crumble the cake. If you don’t have a food processor you can do this by hand but it will just take longer.

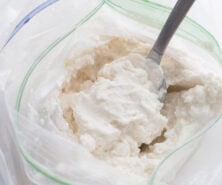
3. Next, mix in your frosting.
We used about 2/3rds of the jar but start slow and add more as needed. You want it to be sort of like playdough. You don’t want it to be too sticky or creamy with the icing so add a little bit at a time until you get a good consistency that will allow you to roll it easily into a ball.
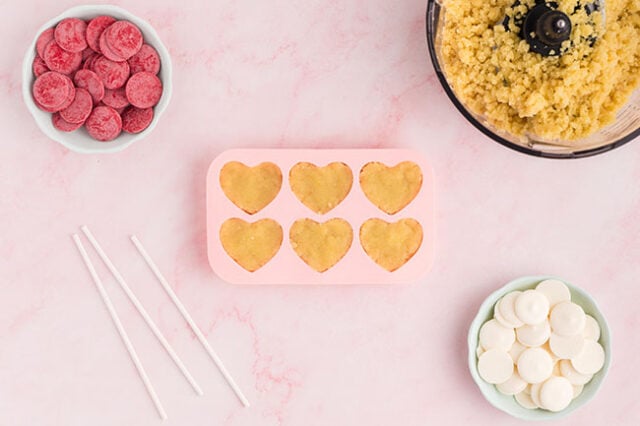
4. Insert cake mix into your heart mold.
Press down so you fill the full mold. If you don’t have a heart mold, you could also lay out your mix in a pan and use a small heart cookie cutter.
5. Chill.
Chill the hearts in the mold for 2 hours in the refrigerator.
6. Melt candy melts.
Before you are ready to pull out from the fridge, melt your candy melts.
Melt slowly or you may overcook them. Follow the package directions. Typically they suggest melting 30 seconds at a time. We like to do half power for 30 seconds and then add 30 seconds if needed. If partially melted, use a spoon to stir and allow the heat to melt the rest. This will ensure you don’t overcook your candy melts.
Add the candy melt into a piping bag, or you can use a spoon to drizzle it onto your cake pops.
7. Remove your cake pops from the fridge.
Dip some white chocolate onto your candy sticks and insert part way into your cake pop.

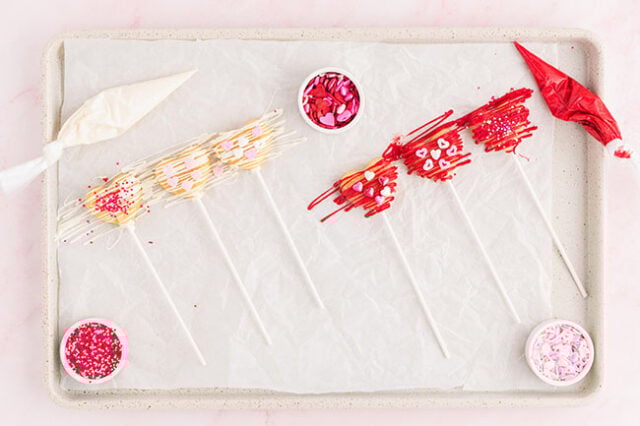
8. Decorate the cake pops.
The easy way: take a spoon and drizzle the chocolate on top of your cake pop.
With a piping bag: put the chocolate in an icing bag and cut a small tip at the end. When the chocolate is still warm, move your from side to side over the cake pop to get smooth clean lines. You can keep doing this a few times to get a thicker layer of chocolate, if desired.
Add the sprinkles right away. If the chocolate dries before the sprinkles get put on you can add some chocolate to the back of the sprinkle or apply a dot of chocolate on the dried chocolate and apply the sprinkle.
Once the sprinkles are added, move the cake pops to a clean area. This will help the chocolate fall to the sides without having to break any extra chocolate off.
Print the recipe here!

Heart Cake Pops – Valentine’s Day Treat
Ingredients
- white and red candy melts
- cake pop sticks
- heart sprinkles
- cake mix
- cake frosting
- heart mold
Instructions
- First you need to bake your cake. Once it’s baked and cooled, use a food processor to crumble the cake. If you don’t have a food processor you can do this by hand but it will just take longer
- Next, mix in your frosting. We used about 2/3rds of the jar but start slow and add more as needed. You want it to be sort of like playdough. You don't want it to be too sticky or creamy with the icing so add a little bit at a time until you get a good consistency that will allow you to roll it easily into a ball.
- Insert cake mix into your heart mold. Press down so you fill the full mold. If you don’t have a heart mold, you could also lay out your mix in a pan and use a small heart cookie cutter.
- Now chill for 2 hours in the refrigerator.
- Before you are ready to pull out from the fridge, melt your candy melts. Melt slowly or you may overcook them. Follow the package directions. Typically they suggest melting 30 seconds at a time. I like to do half power for 30 seconds and then add 30 seconds if I need it. If partially melted, use a spoon to stir and allow the heat to melt the rest. This will ensure you don't overcook your candy melts!
- Remove your cake pops from the fridge. Dip some chocolate onto your candy sticks and insert part way into your cake pop.
- Decorate the cake pops.The easy way: use a spoon and drizzle the chocolate on top of your cake pop. With a piping bag: put the chocolate in an icing bag and cut a small tip at the end. When the chocolate is still warm, move your hand from side to side over the cake pop to get smooth clean lines. You can keep doing this a few times to get a thicker layer of chocolate, if desired. Add the sprinkles right away. If the chocolate dries before the sprinkles get put on you can add some chocolate to the back of the sprinkle or apply a dot of chocolate on the dried chocolate and apply the sprinkle.Once the sprinkles are added, move the cake pops to a clean area. This will help the chocolate fall to the sides without having to break any extra chocolate off.


Share a Comment!
We LOVE hearing from you! Submit your question or comment here.
Your email address will not be published.
Required fields are marked *